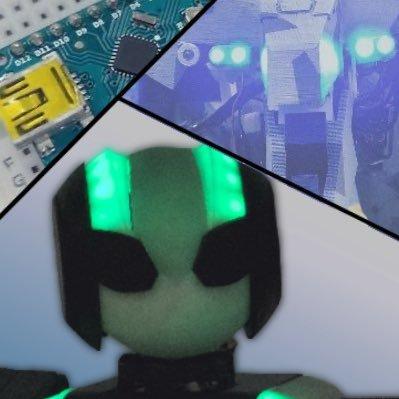
アイデアスケッチ。
テオヤンセン氏の作品「ストランドビースト」が、ゲーム「DEATH STRANDING」の世界で活躍していたら・・・という設定でデザインを考えた。
Idea sketch.
The design was based on the idea that Theo Janssen's work "Strandbeast" would be active in the world of the game "DEATH STRANDING".
脚部の試作。
各リンクの比率は決まっているので、形状でデスストランディングのメカ意匠を表現。
Prototype of the legs.
The proportions of each link are fixed, so the shape expresses the mechanical design of Death Stranding.
ディテールを追加して全12脚を3Dプリント。
3D printed all 12 legs with additional detailing.
https://x.com/tn340/status/1801452933948608983/video/1
組み立てにはM3ビスを使用。
事前にすべての貫通穴とタップを加工した。
M3 screws are used for assembly.
All through holes and taps were machined in advance.
12脚のプリント、組み立てが完了。
Printing and assembly of 12 legs is complete.
フレームの部品をプリント。
外径6mmのアルミパイプをカット・穴あけ・タップ加工をして、構造体のフレームにする。
Printing frame components.
Cut, drill, and tap an aluminum pipe with an outside diameter of 6 mm to form the frame of the structure.
クランクシャフト。
回転を伝達できるように各パーツは六角スペーサで締結して組み立てている。
リンクの駆動部分が六角⇔丸穴の摺動になってしまうが、スムーズに動いたので採用。
フレームとの固定部にはベアリングを使用してスムーズに動くようにしている。
Crankshaft.
Each part is assembled by fastening with a hexagonal spacer so that rotation can be transmitted.
Although the driving part of the linkage slides between hexagonal and round holes, it was adopted because it moved smoothly.
A bearing is used for the fixed part with the frame to ensure smooth movement.
https://x.com/tn340/status/1802374006122926376/video/1
脚ユニットの組み立て。パーツを順番にアルミパイプに通してビス止めする。
脚部は全く同じ形状のユニットを2つ使用している。
さらに各ユニットは同じ部品が並んでいるだけなので、足を増やしていくこともできる。
この構造はオリジナルのストランドビーストも同じであるため、シンプルで面白い構造だと思った。
Assembling the leg unit. The parts are passed through the aluminum pipe in sequence and screwed together.
The legs are made of two units of exactly the same shape.
Furthermore, each unit is just a row of identical parts, so the number of legs can be increased.
Since this structure is the same for the original Strandbeast, we thought it was a simple and interesting structure.
モーターユニット。
横方向の大きさを抑えるため、モーターを互い違いに配置しギヤで伝達する構造にした。
Motor unit.
In order to reduce the horizontal size, the motors are arranged alternately and transmitted by gears.
頭。パン・チルト軸に2つのサーボモータを使用して感情表現や進行方向の表現ができるようにした。
また、内部にLEDを配置しバッテリー残量やロボットのインジケーションが可能になっている。
クリアパーツはKOTOBUKIYAのプラモデル「NOSERU」E部品の余剰パーツ。
クリアパーツがあることで光が横からも見えて良い見た目になった。
Head. Two servo motors are used for the pan and tilt axes to enable expression of emotion and direction of travel.
In addition, LEDs are placed inside to enable battery level and robot indications.
The clear parts are surplus parts from KOTOBUKIYA's plastic model "NOSERU" E-parts.
The clear parts allow the light to be seen from the side for a better appearance.
基板。ユニバーサル基板にM5Stamp、DCDCなどを配置して作成。
プログラムを書き込むときはM5Stampを都度外す。
基本的にはGPIOを取り出しているだけなのでシンプルだが、ゆくゆくはPCBで作って置き換えたい。
ロボット下側の空洞にはバッテリーを入れる。
Board. Created by placing M5Stamp, DCDC, etc. on a universal board.
M5Stamp is removed each time when writing a program.
Basically, it is simple because it is just taking out GPIOs, but eventually I would like to make it with PCB and replace it.
A battery is placed in the cavity on the underside of the robot.
組み立て完了!
Assembly complete!
コントローラーのボタン・スティックによって各サーボモータが動くようにしている。
脚部を動かすサーボモータ(KRS-3301)は、無限回転モードに設定。
Each servo motor is moved by a button/stick on the controller.
The servo motor (KRS-3301) that moves the legs is set to infinite rotation mode.
https://x.com/tn340/status/1809063994789146903/video/1
アナログスティックの値をそのままモータの回転スピードに設定すると低回転時の調整が難しい。
そのため図のようなカーブのテーブルを作成して、スティックの操作量に対応するPWMの値を設定して改善した。
If the analog stick value is set directly to the motor rotation speed, it is difficult to adjust at low RPM.
Therefore, a gamma curve table was created and the PWM value corresponding to the stick operation amount was set to improve the situation.
https://x.com/tn340/status/1816465377507041681/video/1
https://x.com/tn340/status/1817876710219759748/video/1